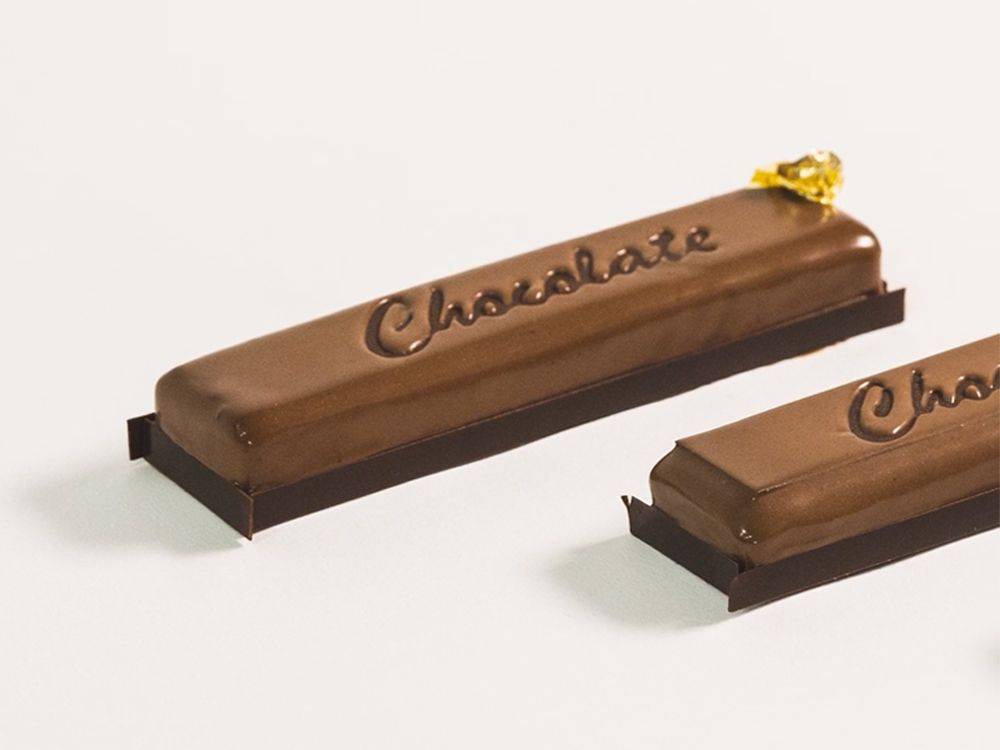

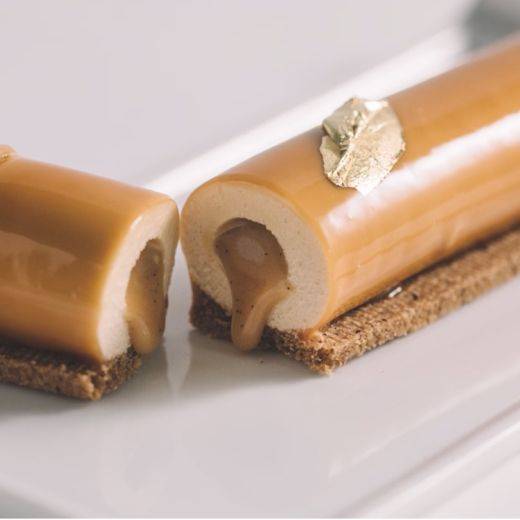
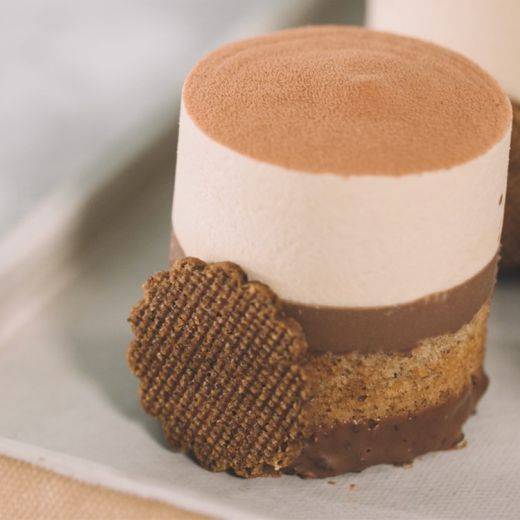
Chocolate Boost Bars
These incredible chocolate boost bars deliver an intense chocolate taste with different textures such as a sablé, mousse, crémeux, sponge cake, and ganache. You will love their flavor as much as their sharp and chic look.
- Level:
-
Difficult
- Makes:
-
12 Yield
- Shelf life:
-
2 days
- Conservation:
-
Refrigeration at 4°C
Chocolate Sablés
Ingredients: Chocolate Sablés
-
6.6 ozbutter
-
1/2 piece(s)vanilla bean
-
1/2 piece(s)orange zest
-
7.9 ozcake flour
-
0.1 ozsalt
-
1.3 ozorange juice
-
2.6 ozsugar
Preparation: Chocolate Sablés
- Chop the chocolate very finely. Note: for a larger production, you can chop the chocolate in a food processor.
- Place most of the butter into the mixer bowl.
- Cut the vanilla bean lengthwise, scrape the seeds and add them to the bowl.
- Zest the orange with a microplane over the mixer bowl.
- Add the rest of the butter to the melted cocoa mass and mix well.
- Add the flour to the mixer bowl and mix on medium speed for a few minutes until the dough comes together.
- In the meantime, add the salt to the orange juice and whisk until the salt is dissolved.
- Add the cocoa mass to the mixer bowl and mix until well incorporated.
- Add the sugar, the orange juice, and the chopped chocolate and mix for a few seconds until well incorporated.
- Pour the dough on a parchment paper and cover with another.
- Roll the dough to a 1.5 mm (0.06") thickness.
- Reserve in the freezer for one hour.
- Once the dough is frozen, slice into 2.5 cm (0.98") by 12.5 cm (4.9")rectangles using a ruler and a knife.
- Bake at 160C°C (320°F)for 12 minutes.
- Let it cool completely then place it in the blast freezer.
- Mix equal amounts of cocoa butter and melted chocolate and pour into the spray gun. Make sure the mix is fluid and use a heat gun to heat the mix if needed.
- Spray the sablés all around with the mix.
- Reserve in the blast freezer.
View tools
- Metal Tray
- Whisk
- Knife
- Bowl(s)
- Parchment paper
- Spray gun
- Ruler (s)
- Rolling pin
- Silpat
- Small paring knife
- Cutting board
- Microplane
- Tabletop mixer, mixing bowl and a paddle attachment
Chocolate Sponge Cake
Ingredients: Chocolate Sponge Cake
-
1.8 ozMilk 1
-
2.1 ozbutter
-
1/2 piece(s)vanilla bean
-
3.2 ozSugar #1
-
15.4 grsalt
-
2.5 ozcake flour
-
1.4 ozMilk 2
-
3.5 ozEggs, whole
-
4.2 ozeggs yolks
-
0.3 ozbaking powder
-
0.5 ozrum
-
13.1 ozegg whites
-
1.8 ozSugar #2
-
0.3 ozAlbumen
Preparation: Chocolate Sponge Cake
- Put the first quantity of milk, sugar, butter and salt in a saucepan and heat.
- Cut the vanilla bean lengthwise, scrape the seeds and add to the saucepan.
- When the butter is completely melted, add the cocoa mass and mix until it is melted.
- Add the flour and whisk well just until the flour is incorporated.
- Use the spatula to scrape the sides of the dough and press down on it. When the dough separates from the sides of the pan, it's ready.
- Put the dough in the mixer bowl, add the second quantity of milk immediately and mix to cool down the temperature.
- Mix the eggs and the egg yolks together in a small bowl.
- Add half the eggs to the mixer bowl and mix on medium speed until well incorporated.
- Add the rest of the eggs little by little and mix well after each addition.
- Add the baking powder and rum and mix again on medium speed.
- Pour the dough into a food processor and turn it on.
- In the meantime, place the egg whites in the bowl of a tabletop mixer with a whisk attachment and mix on medium speed.
- Mix the second quantity of sugar and the dry egg whites in a bowl.
- After one or two minutes of whipping, add half the dry egg and sugar mix to the whipped egg whites. Add the rest
- Pour the dough into a mixing bowl.
- Add a little of the egg whites to the chocolate mix and mix to lighten it. Add the rest of the whipped whites and fold gently until well mixed.
- Adjust your raplette height to 0.4 cm (0.16").
- Place the silpat on the work surface.
- Place the raplette on the short side of the silpat, pour the dough mix in the raplette and swipe. Alternatively, if you don't have a raplette, you can spread the dough on the silpat with an offset spatula.
- Place the silpat on a metal tray and bake in a preheated 190° C (375°F) oven for 5 minutes.
- Let it cool completely and then place in a blast freezer until frozen.
- Flip the sheet of sponge cake on a parchment paper and then carefully peel the silpat away.
- With a ruler, measure the size of the silicone mold and cut rectangles in the sponge cake.
- Reserve until ready to use.
View tools
- Cooktop
- Saucepan
- Metal Tray
- Whisk
- Knife
- Bowl(s)
- Parchment paper
- Mixing bowl (s)
- Ruler (s)
- Silpat
- Thermomix® or food processor
- Silicone mold
- Spatula
- Tabletop mixer, mixing bowl, a paddle attachment and a whisk
- Raplette
Chocolate Ganache
Ingredients: Chocolate Ganache
-
5.3 ozHeavy cream, 35% fat
-
2.6 ozwater
-
0.7 ozsugar
-
0.9 ozglucose syrup
Preparation: Chocolate Ganache
- Place the cream, water, sugar and glucose in a saucepan and bring to a boil.
- Place the chocolate in a tall recipient.
- Once the cream is boiling, pour it on the chocolate and blend with an immersion blender until emulsified.
- Pour the ganache in a piping bag.
- Cut a hole in the piping bag and pipe a thin (2 mm/0.08") layer of ganache in the bottom of each mold cavity.
- Place in the blast freezer and reserve.
View tools
- Cooktop
- Saucepan
- Metal Tray
- Tall recipient
- Immersion blender
- Piping Bag
- Scissors
- Bowl(s)
- Silicone mold
- Spatula
Base Cream for Crémeux
Ingredients: Base Cream for Crémeux
-
8.8 ozWhole milk
-
1/2 piece(s)vanilla bean
-
3.5 ozsugar
-
0.7 ozRice starch
-
3.5 ozEgg yolk
Preparation: Base Cream for Crémeux
- Heat the milk in a saucepan.
- Cut the vanilla bean lengthwise, scrape the seeds and add to the saucepan.
- Place the sugar and rice starch in a separate saucepan and mix.
- Add the egg yolks to the sugar mix and whisk well.
- Once the cream is boiling, take it off the heat, add it to the sugar mix and whisk well.
- Place the pot back on the heat and whisk constantly until the cream is thick.
- Use it right away to prepare the chocolate crémeux.
View tools
- Cooktop
- Saucepan
- Whisk
- Bowl(s)
- Spatula
Chocolate Crémeux
Ingredients: Chocolate Crémeux
-
7.1 ozBase cream, warm
Preparation: Chocolate Crémeux
- Place the chocolate in a tall recipient.
- Pour 200g (7oz) of hot base cream on the chocolate and blend with an immersion blender until well emulsified.
- Scrape down the sides of the recipient and blend again.
- Pour the chocolate crémeux in a piping bag.
- Place the silicone mold on a metal tray.
- Pipe some crémeux in the bottom of each mold cavity.
- Top with a rectangle of sponge cake and tap down with your fingertips.
- Pipe more crémeux on the sponge cake layers and smooth it with a spatula.
- Place in the blast freezer until solid.
View tools
- Metal Tray
- Tall recipient
- Immersion blender
- Piping Bag
- Scissors
- Offset spatula
- Scale
- Silicone mold
- Spatula
Chocolate Mousse
Ingredients: Chocolate Mousse
-
4.4 ozBase cream, warm
-
8.8 ozHeavy cream 35% fat
Preparation: Chocolate Mousse
- Place the cream in a mixer bowl and turn it on medium speed.
- In a mixing bowl, mix the melted chocolate (35°C- 95°F) with the warm base cream (35°C- 95°F).
- Mix using an immersion blender until well emulsified and shiny.
- Once the cream is whipped to stiff peaks, add a little to the chocolate mix and blend.
- Add the rest of the whipped cream to the chocolate and fold it gently with a spatula.
- Pour the mousse in a piping bag and cut the tip off.
- Pipe a thin layer of mousse in the mold with the ganache.
- Top with one of the frozen sponge and crémeux rectangles.
- Smooth it out with a spatula and place another shortcake rectangle on top.
- Place in the blast freezer until needed.
View tools
- Metal Tray
- Thermometer
- Immersion blender
- Bowl(s)
- Offset spatula
- Mixing bowl (s)
- Tabletop mixer, mixing bowl and a whisk
- Spatula
- Large Silicone mold
Chocolate Glaze
Ingredients: Chocolate Glaze
-
0.5 ozGelatin powder 200 bloom
-
2.6 ozwater
-
1.0 lbHeavy cream 35% fat
-
1/2 piece(s)vanilla bean
-
1.8 ozsugar
-
2.3 ozinverted sugar
-
2.3 ozGlucose syrop
-
0.9 ozVan Houten Red Cameroon 2224 cocoa powder
-
2.9 oz60-40-41NV
Preparation: Chocolate Glaze
- Mix the gelatin and water together in a bowl. Reserve.
- Put the cream in a saucepan and heat.
- Cut the vanilla bean lengthwise and scrape the seeds into the saucepan.
- Add the sugar, inverted sugar and glucose to the cream. Mix and continue heating.
- Place the chocolate and hazelnut paste in a tall recipient.
- Just before the cream starts boiling, add the cocoa powder and whisk well.
- Pour the boiling cream through a sieve onto the chocolate and hazelnut mix.
- Add the gelatin and blend with an immersion blender until well emulsified.
- Cover with plastic film making sure the film touches the surface of the glaze.
- Place in the refrigerator until ready to use.
View tools
- Cooktop
- Saucepan
- Whisk
- Knife
- Tall recipient
- Immersion blender
- Bowl(s)
- Plastic film
- Spoon
- Spatula
- Sieve
Decorations
Ingredients: Decorations
Preparation: Decorations
For the top decorations:
- Pour the pre-crystallized chocolate on a piece of parchment paper and spread into a thin layer with a rolling pin.
- Wait a few seconds for the chocolate to set and then place the parchment paper, chocolate side down on the guitar sheet and scrape with a metal scraper.
- Remove from the guitar wires and place on your work surface, chocolate side up.
- With a ruler and a sharp knife, measure and cut rectangles the size of your chocolate bars.
- Flip the decorations over on top of another sheet of parchment, and then peel off the original parchment paper carefully.
- Reserve the rectangles at room temperature.
For the outer decorations:
- Pour the pre-crystallized chocolate on a guitar sheet and spread into a thin layer with a rolling pin.
- Wait a few seconds for the chocolate to set and then place the guitar paper chocolate side down on the guitar sheet and scrape with a metal scraper.
- Move the guitar sheet and align the center of the rectangles with the guitar wires and scrape again to cut thinner rectangles.
- Remove the guitar sheet and place the chocolate side down on a metal tray covered with a parchment paper.
- Cover with another metal tray. Reserve at 16°C (61°F) until needed.
View tools
- Metal Tray
- Knife
- Bowl(s)
- Parchment paper
- Guitar cutter
- Ruler (s)
- Rolling pin
- Metal Scraper
- Guitar sheet
Assembly
Ingredients: Assembly
-
Gold leaves
Preparation: Assembly
- Unmold the frozen chocolate bars and place on a rack lined with a tray.
- Warm the top of the bars using a heat gun and place a rectangle of chocolate decoration on it.
- Warm the chocolate decoration with the heat gun and place the stencil in the center of the bar.
- Note: You can use whatever stencil you have on hand or you can make your own. Cover the bar with the chocolate glaze.
- Smooth the top out with a spatula and remove the excess glaze.
- Very carefully remove the stencil with the tip of a cutter.
- Cut strips of chocolate slightly longer than the long side of
- your bars. Place them off centered along the sides of the bars.
- Repeat with the short sides.
- Use tweezers to place some gold leaves on one of the bars.
- Allow the bars to thaw completely before serving.
View tools
- Metal Tray
- Knife
- Heat gun
- Ruler (s)
- Rack
- Tweezers
- Small offset spatula
- Cutter
- Stencil


Comments