Moulding chocolate figures is quite easy if you’re familiar with all the principles. Watch this step-by-step video to really get the knack of it.How to make Chocolate Figures with a Mould
GOOD TO KNOW
What should you take to heart when making hollow figures?
Use polycarbonate moulds. These yield the highest gloss and contract slower than chocolate, which makes unmoulding far easier.
Choose the fluidity of the chocolate according to the size of your moulds: a three-drop fluidity for smaller moulds, a two-drop fluidity for bigger ones.
Heat the moulds briefly before pouring in your tempered chocolate. This way, you’ll avoid temperature shocks that could make your chocolate turn grey afterwards.
Make sure that the heat can escape from the mould during cooling. If it remains trapped inside the mould, chances are high the chocolate shell will show dull spots after the chocolate has cooled down.
Creating hollow figures with single moulds
Needed:
- Single moulds (for two chocolate figure halves)
- A chocolate melter or tempering machine
- A small palette knife
- A chocolate scraper
- A ladle
- A grill rack
- Paper
Temper your melted chocolate and warm your moulds up to 26 to 27°C with a heat gun before use. Do make sure that your moulds are squeaky clean and don’t make them warmer than your chocolate.
Step 1
Pour the tempered chocolate into the mould.
Step 2
Gently tap the edges of the mould with the back of a palette knife to remove any air bubbles from the chocolate or shake mechanically.
Step 3
Swirl the chocolate around in the mould to create a smooth layer of chocolate that covers all sides of the mould evenly.
Step 4
Pour the excess chocolate back into the melter.
Step 5
Let the mould drip on the grill rack for a few minutes (until the dripped-out chocolate starts to set). You can also let the moulds drip onto paper. This will create a chocolate shell with thicker edges (where it touches the paper), which will form a stronger seam when you assemble the two mould halves together.
Step 6
If the chocolate shell appears too thin (particularly with large moulds), repeat steps 1 to 5. The bigger the mould, the thicker the chocolate shell needs to be.
Step 7
Scrape off the excess chocolate from the mould surface and let the hollow figure harden in a refrigerator at 14 to 16°C for 30 minutes. Always place the mould with its bottom facing sideways or upwards to keep the heat from remaining trapped inside.
Step 8
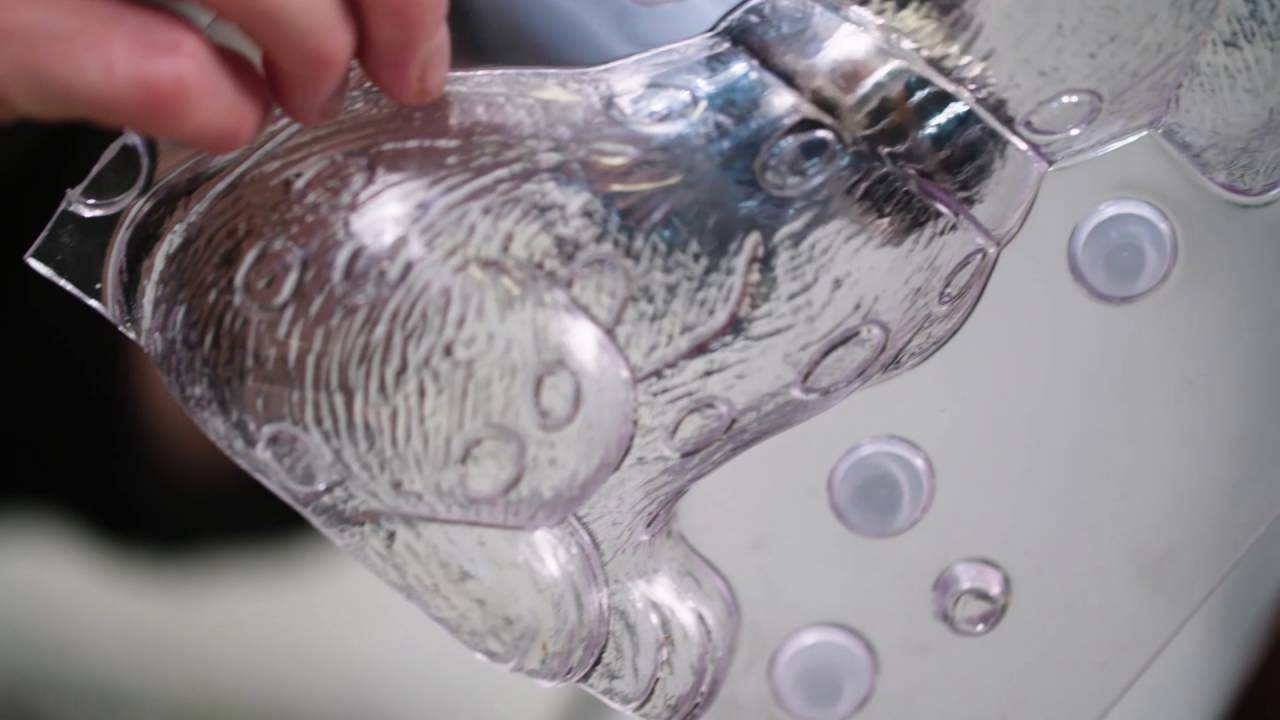
After cooling, gently tap the sides of the mould with the back of a palette knife and take the figure out of the mould.
Tip:
Wear gloves when you remove the hollow figures from their moulds to avoid leaving fingerprints on the chocolate shell. Ideally, unmould your hollow figures on a perfectly clean surface to keep them from attracting dust or tiny chocolate particles, seeing as they are statically charged for a brief period when they come out of the mould
Which type of chocolate is best suited to create chocolate hollow figures?
For small and medium-sized moulds:
All chocolates with a basic three-drop fluidity are ideal for this. They contain exactly the right amount of cocoa butter to form an even chocolate layer with the perfect thickness.
For medium-sized hollow figures, we recommend repeating steps 1 to 4 carefully to achieve a thick enough chocolate shell.
For large moulds:
Your best choice for large moulds is a less fluid chocolate, i.e. chocolate with a lower cocoa butter content. It leaves a thicker chocolate layer inside the mould in just one single pouring. Given that the chocolate shell contracts during cooling, it is important that it has the necessary minimum thickness. This determines the strength of the shell and makes unmoulding much easier. Chocolate recipes with a two-drop fluidity (containing 3% to 4% less cocoa butter) are perfect for these applications.
Creating hollow figures with double moulds
Needed:
- Double moulds kept together by magnets or clips (for whole chocolate figures)
- A chocolate melter or tempering machine
- A ladle
- A chocolate scraper
- A palette knife
- A grill rack
- Paper
Temper your melted chocolate and warm your mould halves up to 26 to 27°C with a heat gun before use. Do make sure that your mould halves are squeaky clean and don’t make them warmer than your chocolate.
Step 1
Pour the tempered chocolate into the conjoined mould halves.
Step 2
Gently tap the edges of the mould with the back of a palette knife to remove any air bubbles from the chocolate or shake mechanically.
Step 3
Swirl the chocolate around in the mould to create a smooth layer of chocolate that covers all sides of the mould evenly.
Step 4
Pour the excess chocolate back into the melter.
Step 5
Let the mould drip on the grill rack for a few minutes (until the dripped-out chocolate starts to set).
Step 6
Heads up: make sure your chocolate shell is thick enough. The shell hardens and contracts a little during cooling, which releases your chocolate figure from its mould. But to make sure it releases without breaking, the shell of your figure needs to have the necessary thickness and firmness. If the chocolate shell appears too thin (particularly with large moulds), repeat steps 1 to 5. The larger the mould, the thicker your chocolate shell needs to be.
Step 7
Scrape off the excess chocolate from the bottom of the mould and let the hollow figure harden in a refrigerator at 14 to 16°C for 30 minutes. Always place the mould with its bottom facing sideways or upwards to keep the heat from remaining trapped inside.
Step 8
After cooling, remove the clips that keep the moulds halves together and gently tap the sides of the mould with the back of a palette knife. This releases your chocolate figure inside the mould. Now remove the front mould half, place your hollow figure on your worktop and gently force it out by pushing on the back mould half with your thumbs.
Tip:
Wear gloves when you remove the hollow figures from their moulds to avoid leaving fingerprints on the chocolate shell. Ideally, unmould your hollow figures on a perfectly clean surface to keep them from attracting dust or tiny chocolate particles, seeing as they are statically charged for a brief period when they come out of the mould.
Which type of chocolate is best suited to create chocolate hollow figures?
For small and medium-sized moulds:
All chocolates with a basic three-drop fluidity are ideal for this. They contain exactly the right amount of cocoa butter to form an even chocolate layer with the perfect thickness.
For medium-sized hollow figures, we recommend repeating steps 1 to 4 carefully to achieve a thick enough chocolate shell.
For large moulds:
Your best choice for large moulds is a less fluid chocolate, i.e. chocolate with a lower cocoa butter content. It leaves a thicker chocolate layer inside the mould in just one single pouring. Given that the chocolate shell contracts during cooling, it is important that it has the necessary minimum thickness. This determines the strength of the shell and makes unmoulding much easier. Chocolate recipes with a two-drop fluidity (containing 3% to 4% less cocoa butter) are perfect for these applications.

Need support with your chocolate confections?
- Find troubleshooting guides & tutorials
Comments