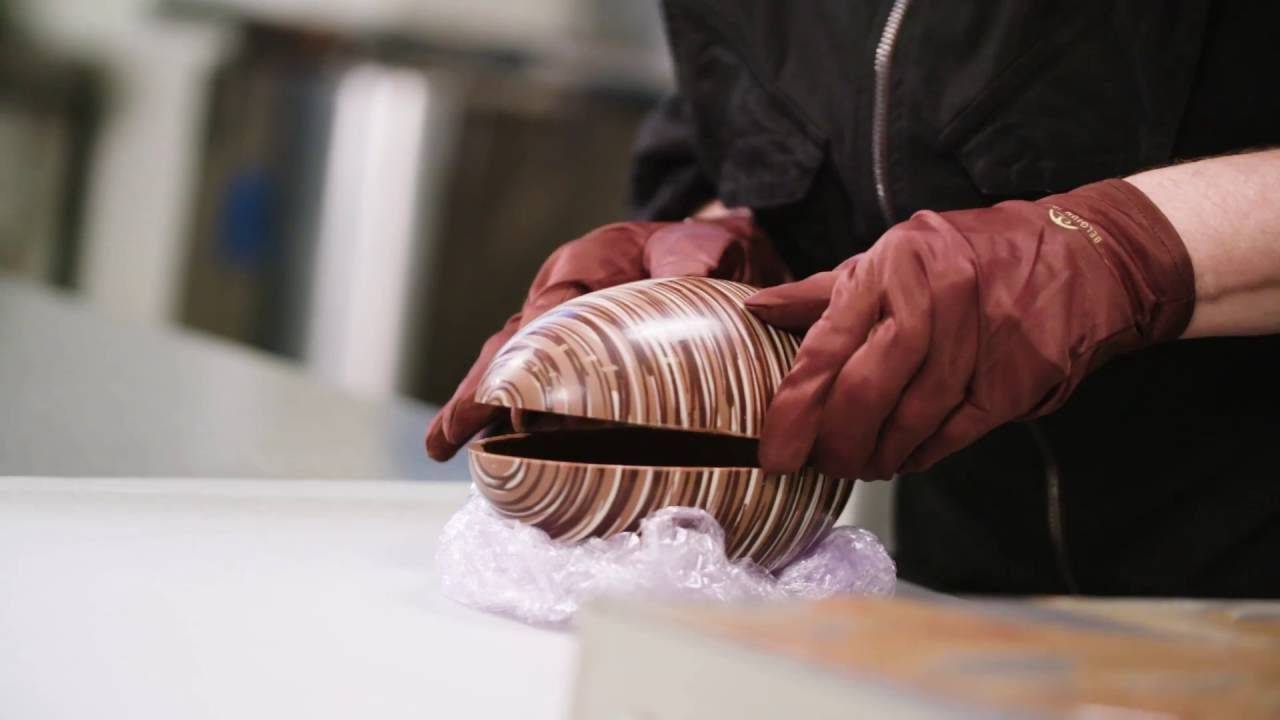
Learn how to put two moulded halves of a chocolate figure together to form a perfect seal.
GOOD TO KNOW
What should you take to heart when making hollow figures?
Use polycarbonate moulds. These yield the highest gloss and contract slower than chocolate, which makes unmoulding far easier.
Choose the fluidity of the chocolate according to the size of your moulds: a three-drop fluidity for smaller moulds, a two-drop fluidity for bigger ones.
Heat the moulds briefly before pouring in your tempered chocolate. This way, you’ll avoid temperature shocks that could make your chocolate turn grey afterwards.
Make sure that the heat can escape from the mould during cooling. If it remains trapped inside the mould, chances are high the chocolate shell will show dull spots after the chocolate has cooled down.
Needed:
Two mould halves with crystallised chocolate
A hot plate
Gloves
Cling film
Step 1
Take the first mould half and gently rub it against the warm plate for a few seconds, just until the chocolate on the outer edges starts to melt.
Step 2
Place the mould half on a wad of cling film. This keeps the chocolate shell in perfect condition and makes assembly easier later on.
Step 3
Take the second mould half and gently rub it against the warm plate for a few seconds as well.
Step 4
Stick both halves together. Make sure to align them quite quickly, so they make a perfect fit. Then let the seam of your hollow figure harden for a few seconds.
Tip:
Wear gloves when handling your chocolate hollow figures to avoid smudging them with fingerprints. Ideally, unmould your chocolates on a perfectly clean surface to keep them from attracting dust or tiny chocolate particles, seeing as they are statically charged for a brief period when they come out of the mould.
Comments